CNC FRETBOARDS AND INLAYS

The CNC bandwagon started to look like a good ride so I invested in a CNC router and set about learning to use a CAD program. The first application that I got working was creating the inlay and pocket for the “Ono” name on my pegheads. After the CAD files were created and refined, it has been very easy to do neat inlays. I’m mostly using mother of pearl for the inlay but on a few occasions have used wood when it was aesthetically desirable and on instruments that are to be shipped overseas. For a small builder, it just doesn’t seem practical to go through the CITES approval process that is necessary for MOP. I can also do other inlays, such as the Thai symbol that an owner requested. In this case, both the logo and the special symbol are wood because the instrument will be shipped to Thailand.

DSCF2853.JPG

Creating the fretboard files was a challenge because I have a dozen different combinations of scale length and number of frets. It’s turned out to be well worth the effort for the amount of work that is saved and for the precision that can be exactly repeated every time. Also, CNC can cut pocket slots that result in a board that conceals the fret ends as if it were bound. A board looks so much cleaner if the fret ends don’t show. Of course, binding can still be used in the conventional manner if desired for decoration. The downside is that removing the ends of the tang on each fret is quite time consuming. Installing the frets on a board with exposed tang ends takes fifteen minutes on a bad day. The same job on a board with concealed fret ends takes a couple of hours or more but the result is worth the extra work.

DSCF0646.JPG
DSCF0725.JPG

The job of neatly trimming off the tang from each end of a fret is tedious but I’ve found that it can be done a little more easily with a mill.

34009366232_28d1e2b6e4_o.jpg
33355551383_3c8c1dcf7a_o.jpg

In the end, the result justifies the investment:

33876860284_ef4ef2a433_o.jpg

IT'S WAY PAST TIME FOR SOME UPDATES!

I’ve been busily building ukes and improved tooling so the blog has been ignored for too long. Above are some glimpses into things that I’ve been working on lately.

Ukulele Guild of Hawai'i 2016

In November, I was again able to attend the annual exhibition of the Ukulele Guild of Hawaii.  This year's event was much larger than last year's and was very well attended by both builders and enthusiasts.  I showed two tenors that were left after the show with Andrew Kitakis of theukulelesite.com (Hawaii Music Supply). Sound samples of both by Kalei Gamiao are on my OnoMAS page.  I was also able to do a podcast with Andrew: epi-17-david-ingalls-ono-ukulele.

Here are a couple of photos:

Andrew and me

Andrew and me

Outstanding builder and musician, Aaron Oya, and ukulele enthusiast extraordinaire, Eddie Monnier

Outstanding builder and musician, Aaron Oya, and ukulele enthusiast extraordinaire, Eddie Monnier

Incredible Quilted Maple!

I recently found some very nice quilted maple that has amazing 3D depth to the grain pattern. It's on its way to being turned into a 16' concert with an Adirondack spruce top.  The appointments are bloodwood and bubinga and it will likely get a rosewood fret board. Here are some photos taken today after the initial coat of finish.


image 2.jpg

A NEW BINDING FIXTURE

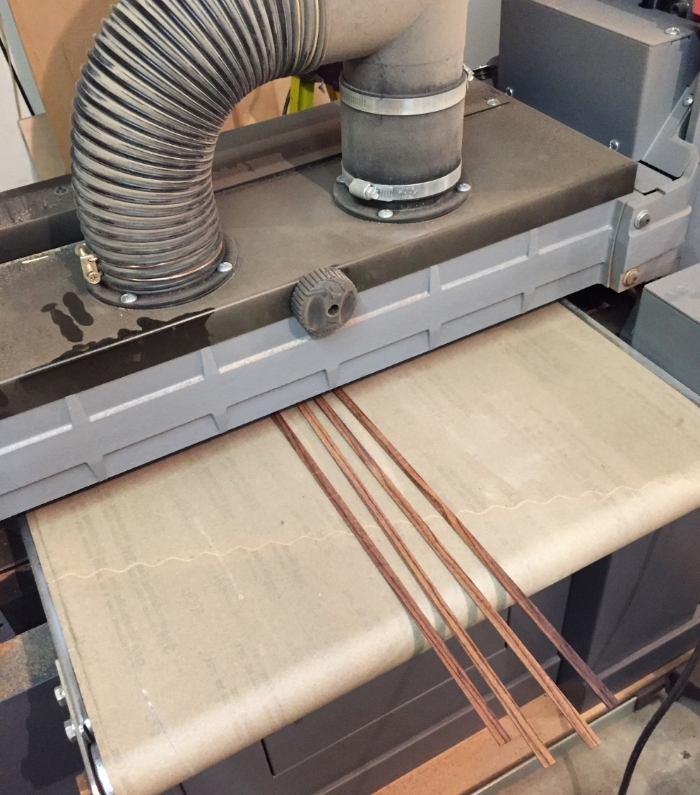
Whether bindings are purchased or cut in the shop from larger stock, they have to be accurately dimensioned for the particular instrument. Getting them to the right thickness is easy. Just run them through the thickness sander:

IMG_0885.JPG

Getting them to the right height is a little more work. In addition to the correct height, the edges need to be square with the flat side. I've been using a funky method that took too much time and finally got tired of it so a new fixture was in order.

This clamps the binding strips between two straightedges that are 1/8" thick. The one on the right is fixed and the other slides laterally over a range of 1/2". The binding strips are placed in the slot between the two straightedges and the left one is slid firmly against them so they can't wobble from side to side. The sliding side is held in place with hex head screws.

IMG_0883.JPG

The whole assembly is then run under the thickness sander. There are always any number of ways to skin cat but this works well for me.